Guide to install Game of Active Directory (GOAD) on VMware_ESXI
GOAD Deployment on ESXI Sphere 8 from scratch
Good day Mates!
For quite some time, I have been intending to address this matter, albeit various commitments have continuously impeded its realization.
Requirements
For GOAD installation on ESXI you need to download the following tools
create an ubuntu machine on ESXI server
ovftool —> install it on the ubuntu machine
pywinrm and ansible —> install it on the ubuntu machine
winrm —> install it on the ubuntu machine
winrm-fs —> install it on the ubuntu machine
winrm-elevated —> install it on the ubuntu machine
GOAD repository
STEP 1
Vagrant installation on Ubuntu Machine
mkdir toolscd toolswgethttps://releases.hashicorp.com/vagrant/2.3.7/vagrant_2.3.7-1_amd64.debdpkg -i vagrant_2.3.7-1_amd64.deb
STEP 2
install vagrant vmware esxi plugins
vagrant plugin install vagrant-vmware-esxivagrant plugin install vagrant-reloadvagrant plugin install vagrant-vmware-desktopvagrant plugin install winrmvagrant plugin install winrm-fsvagrant plugin install winrm-elevated
install Ansible and pywinrm
pip3 install --include-deps ansiblepip3 install ansible-corepip3 install ansible-core==2.12.3pip3 install pywinrm
STEP 3
Download the Goad repository from the Github and configure some initial files for vmware_esxi compatibility
git clonehttps://github.com/Orange-Cyberdefense/GOAD
in this directory GOAD/ansible install the “requirements.yml” file using the following command —> ansible-galaxy install -r ansible/requirements.yml
STEP 4
In the main directory of the “GOAD” remove the previous goad.sh file and use the provided goad.sh file and replace the old file with this new one provided file.

Create a directory called “vmware_esxi” in this directory → “/GOAD/ad/GOAD-Light/providers”

Now we have the directory called “/GOAD/ad/GOAD-Light/providers/vmware_esxi”

STEP 5
Now go back to the main GOAD directory and run the goad.sh
Now run the goad.sh using the follwing command:
bashgoad.sh-t check -l GOAD-LIGHT -p vmware_esxi -m local

→ 2 file will be generated they will be Vagrantfile and inventory
→ Replace these two files with these Vagrantfile & inventory in the "/GOAD/ad/GOAD-Light/providers/vmware_esxi" directory.

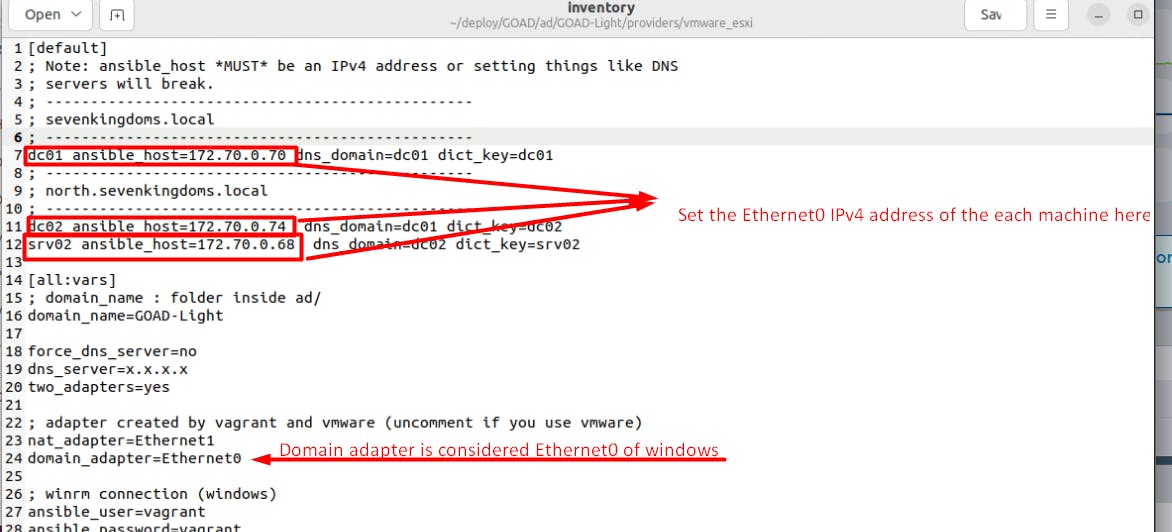
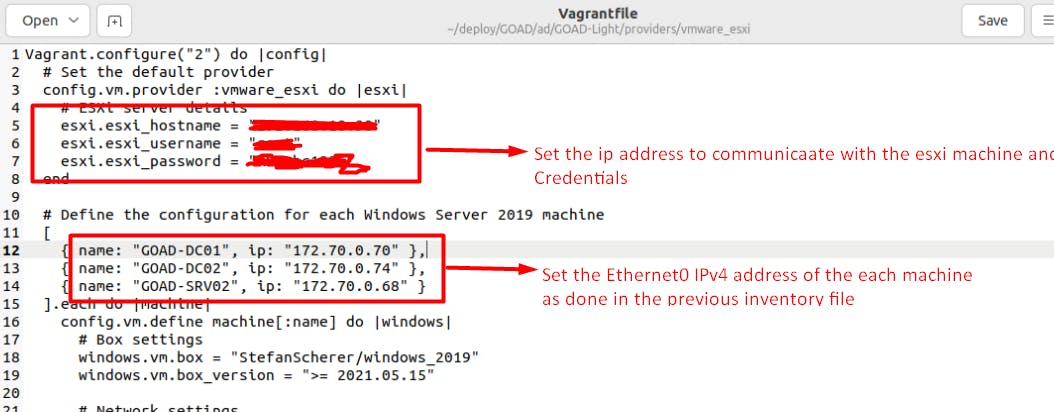
Note: if you want to change the ips of DC01, DC02, SRV02 you have to change the ips inside the inventory file too. This will be used with ansible-playbook while installing the vulnerable AD-set.
STEP 6
Install the OVFTOOL in the ubuntu machine
Since our ESXI version is 8.0.2 we will download the latest version of ovftool which is “v4.6.2” from “developer.vmware.com/web/tool/4.6.2/ovf-tool”
download-Link with the wget command :
Unzip the ovftool file by the follwing command
unzip VMware-ovftool-4.6.2-22220919-lin.x86_64.zip
echo $PATH
cd ovftool
pwd
export PATH=/home/management/tools/ovftool:/home/management/.local/bin:/usr/local/sbin:/usr/local/bin:/ usr/sbin:/usr/bin:/sbin:/bin:/usr/games:/usr/local/games:/snap/bin

STEP 7
Configuring the IP addresses automatically assigned by the vagrant in the provisioning files
Go to the following directory and configure the IP addresses → “/GOAD/ad/GOAD-Light/providers/vmware_esxi”
edit the files as in the screenshots
STEP 8
DEPLOYING WINDOWS ACTIVE DIRECTORY MACHINES ON ESXI sever
Go to the following directory “ad/GOAD-Light/providers/vmware_esxi/” Then run the follwing command: vagrant up
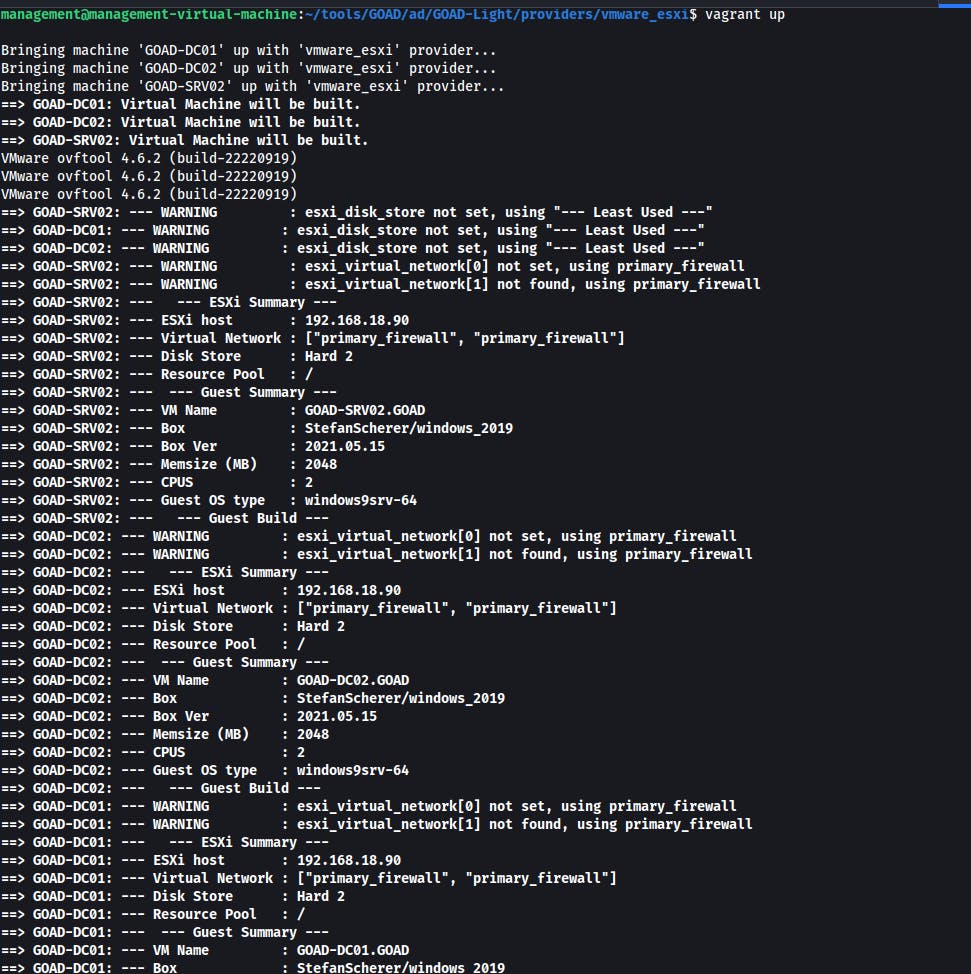
check the adapters of the machines deployed using the vagrant up command
POC of the network adapter of the ubuntu machine
Ubuntu Machine is on the same network as the DCO1 Adapters
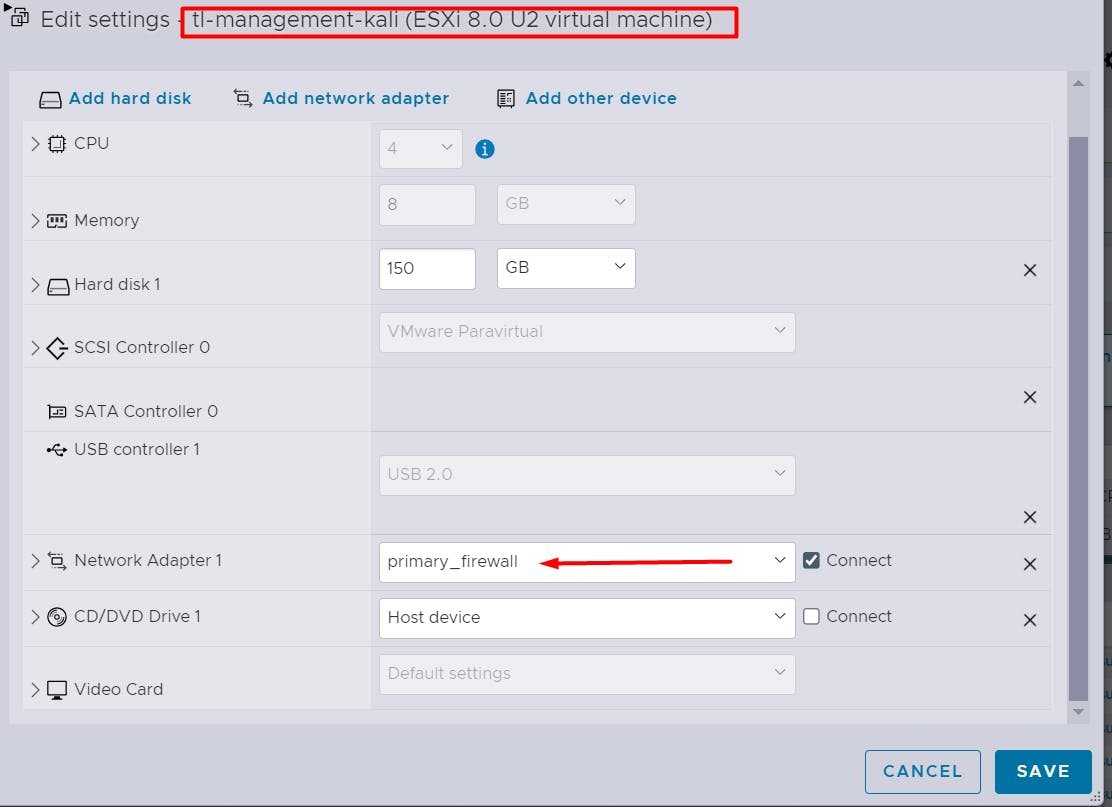
POC: we don't need to change the adapters in order for the provisioning to work properly both of the adapters should be on the same network like in the following screenshots

This is the network scheme of all the machines
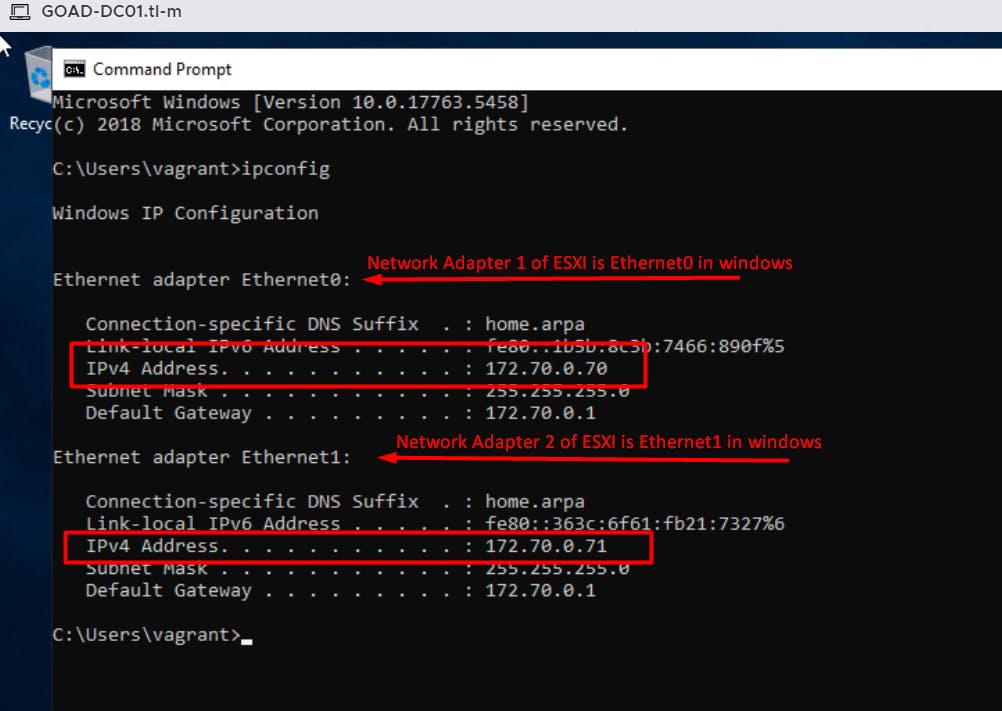
Important Note: Goad provisioning file considering Ethernet0 as the domain adapter and Ethernet1 as the NAT adapter. We will configure the domain adapter IP addresses in the inventory and the Vagrant file before provisioning.
DCO1
Ethernet adapter Ethernet0: IPv4 Address. . . . . . . . . . . : 172.70.0.70
Ethernet adapter Ethernet1: IPv4 Address. . . . . . . . . . . : 172.70.0.71
DC02
Ethernet adapter Ethernet0: IPv4 Address. . . . . . . . . . . : 172.70.0.74
Ethernet adapter Ethernet1: IPv4 Address. . . . . . . . . . . : 172.70.0.75
SRV02
Ethernet adapter Ethernet0: IPv4 Address. . . . . . . . . . . : 172.70.0.68
Ethernet adapter Ethernet1: IPv4 Address. . . . . . . . . . . : 172.70.0.69
STEP 9
Start the provisioning using the ansible
Go to the following directory “/GOAD/ansible”
Run the following command before provisioning:
export ANSIBLE_COMMAND="ansible-playbook -i ../ad/GOAD-Light/data/inventory -i ../ad/GOAD-Light/ providers/vmware_esxi/inventory"
Run the following command to run the provisioning: ../scripts/provisionning.sh
Special Thanks to my friend Syed Asadullah for the help especially in networking part he has done a great job.
